What is bleed?
Bleed is a word designers and artists will hear frequently when submitting a job for print. While there is an old cliché about putting sweat, tears, and blood into your work – this print-production term has a much more technical explanation. So lets cut to the point.
Most artwork comes to the shop with some graphical element reaching the outer edge of the design. This might be a photo, a background colour or design meant to extend to the very edge of the page but the intention is always for the final product to have colour ‘edge-to-edge’ and to not have the concentric white border that you would expect from a home or office printer, especially when you are paying for a professional outcome.
You might be surprised to learn that just like your trusty home printer (yes, the one you almost chucked in the bin after it jammed for the twentieth time) almost all commercial printers have a white safety margin outside the limit of their print area. So how is it that almost all the high-standard print you encounter has colour to the outside edge?
The solution is simple – print slightly more than you want to end up with, and trim down the paper in a guillotine to give you the size you need with colour flush with the edges. This ‘extra’ print is the bleed and it is essential because even the best printers are not perfectly accurate on a run of many sheets – especially when double sided printing is required. If you were to try and cut down to the colour without having extra print on the outside of the cut then you would almost always have some sheets with a thin sliver of white, unprinted paper.

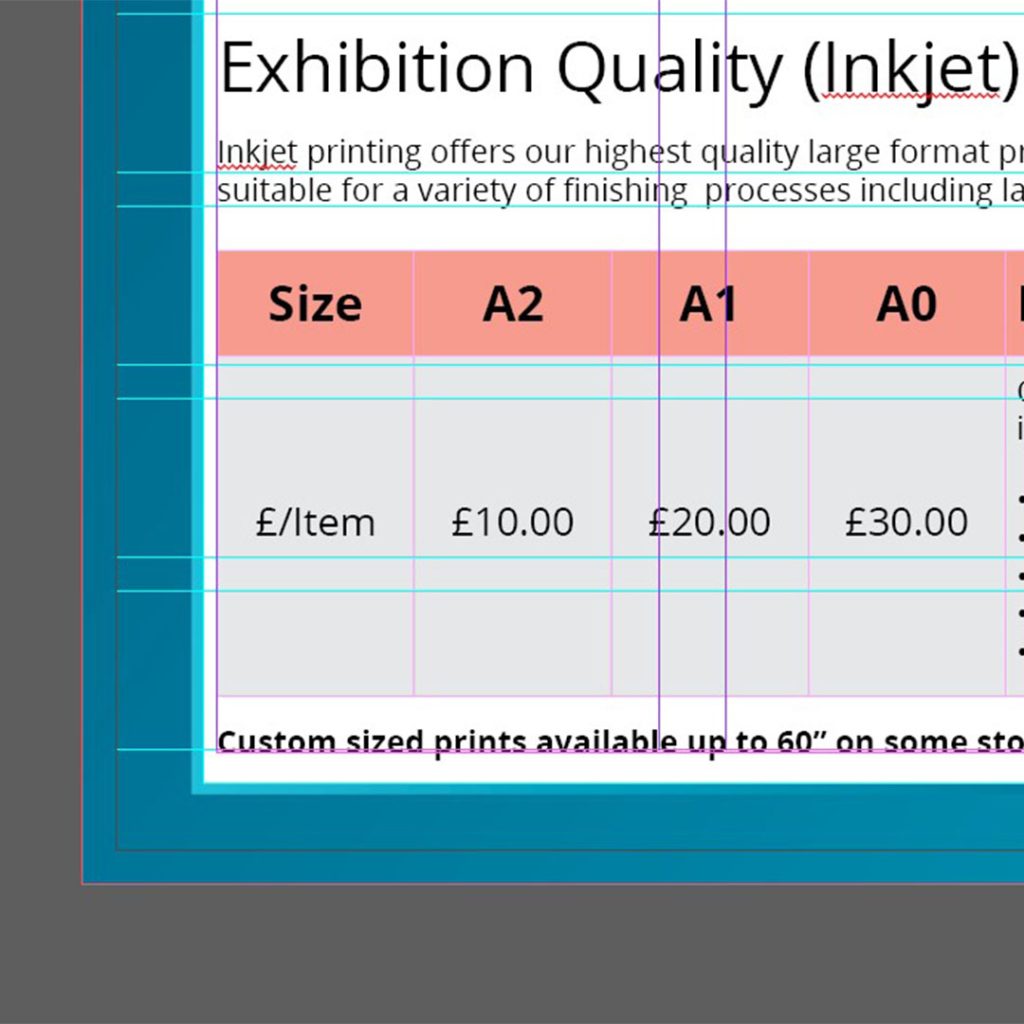
What does a bleed area look like?
A bleed area should look like a seamless extension of your design with any images or backgrounds extending across the full area of the bleed. There should be no important text such as page headers, page footers or page numbers in the bleed area because the bleed will be cut away from the final product.

How do I add bleed?
Printers have been using bleed for many years – long before the advent of digital design. As a result, most desktop publishing software (DTP software) has native support to help designers create a bleed area around the page they are trying to create. It is important to remember that DTP software and photo editing software are intended for different purposes, for example: Adobe Illustrator and InDesign are intended for creating print-ready artwork and offer built-in support for bleed but Adobe Photoshop is an image editor intended to be used for retouching photography, so it does not have bleed functionality included.
As Adobe software is by far the most used toolset for professional designers, we will look at adding bleed within the context of InDesign, Illustrator and Photoshop.
Are bleed areas and margins different?
Bleed areas and margins can be easily confused until you are familiar with using them. The key difference is that a bleed area is not intended to be part of the design – it part of manufacturing your print and not a design element. Page margins are still important and we suggest that you keep text (including headers, footers and page numbers) at least 5mm away from any cut edge.
How to add bleed in InDesign
Adding bleed when creating a new InDesign document
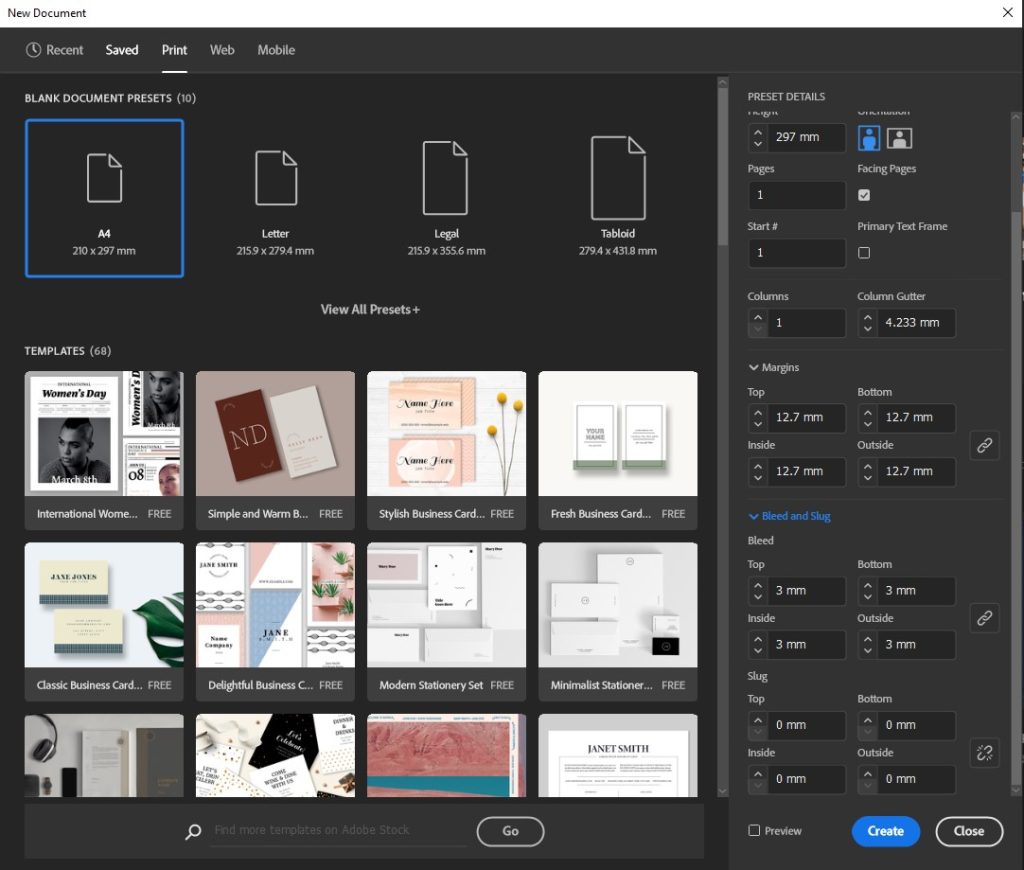
- Open the new document dialogue box
- Set your desired page size and margins
- Open the ‘Bleed and Slug’ dropdown menu
- Set the bleed value to at least 3mm on all sides
- If you are designing spreads you should still use a 3mm bleed on the inside of the page. This will give a bleed area on the front and back pages but won’t affect double page spreads
- Create your document, you should now see a red guideline around the outside of your page. The space between the white page area and the red area is your bleed
- You can show or hide guides by pressing ‘W’ when you are not typing in a text box
- Fill this area with your design, but remember that it will eventually be cut off so do not include any important text or key parts of your image
Adding bleed to an existing InDesign document
Sometimes you will need to add bleed to a design that already exists, it is possible to add a bleed area using the following steps, but you must also extend any images or backgrounds to the edge of the bleed area afterwards. If you don’t then you are only creating white space around the edge of your document that will not help us trim down for an edge-to-edge finish.
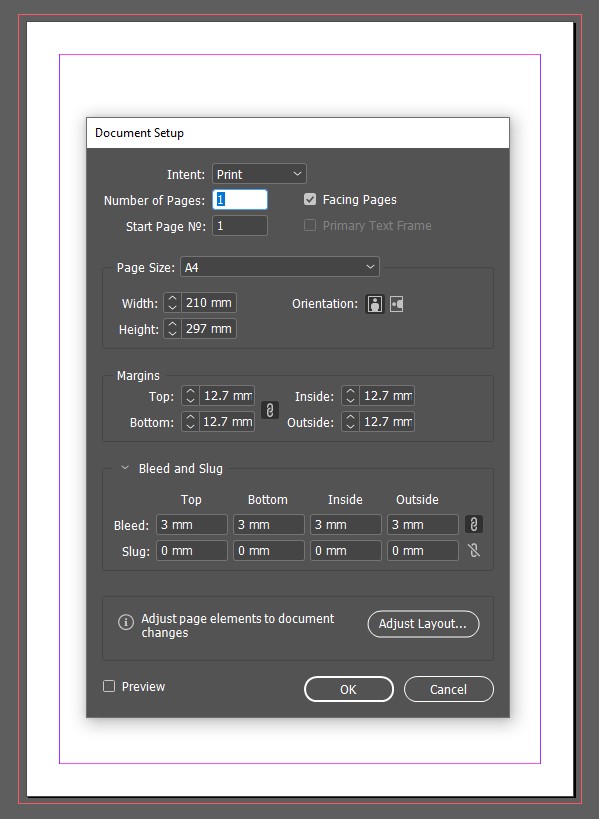
- Open the document you need to edit
- Select the ‘File’ menu
- Click on ‘Document Setup’
- Expand the ‘Bleed and Slug’ dropdown
- Enter a bleed value of at least 3mm on each edge
- Press ‘Okay’
- Make your guides visible (press W if they are hidden) and ensure there is a red line 3mm from the white page
Exporting an InDesign document with a bleed area to .pdf
When you are ready to export your file for print you must make sure to include the bleed as part of the export settings
- Save your document
- Select the ‘File’ menu
- Click on ‘Export’
- Give your file a name
- Select ‘Adobe PDF (Print)’ from the ‘Save as type’ dropdown
- Press Save
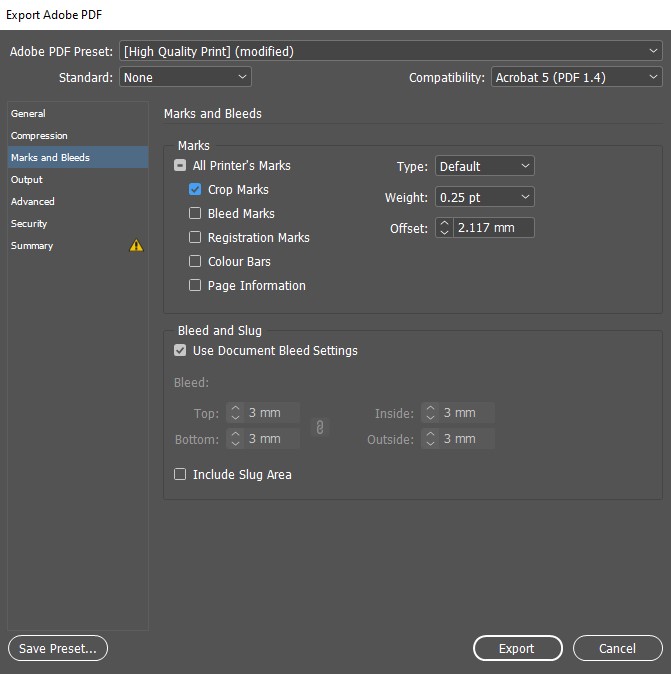
InDesign will open the export options dialogue box
- Select ‘Marks and Bleeds’ from the left-hand menu
- Check the checkbox for Crop Marks from the top right-hand menu
- Check ‘Use Document Bleed Settings’ from the bottom right-hand menu
- Select ‘Export’
How to add bleed in Illustrator
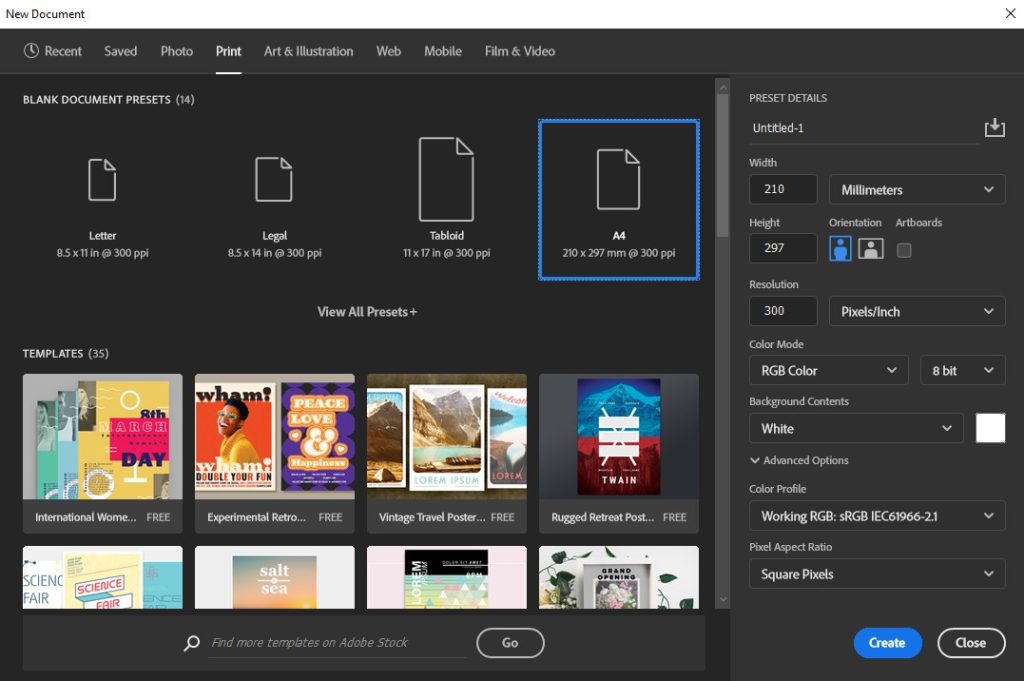
Adding bleed when creating a new Illustrator document
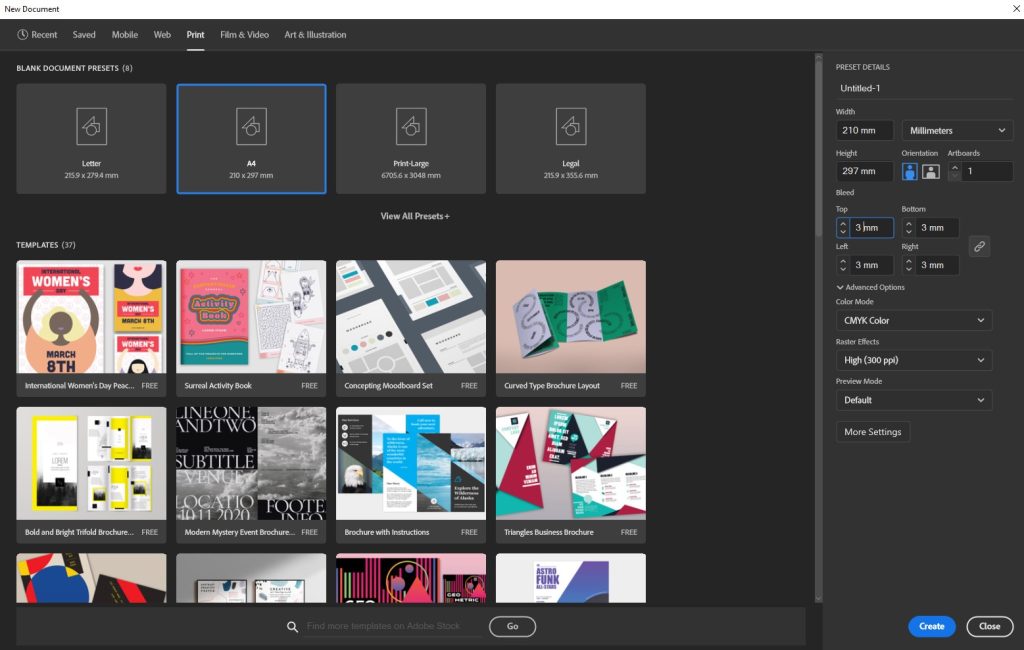
- Open the new document dialogue box
- Choose ‘Print’ from the pre-set menu (this will automatically set your colour space and print resolution to CMYK and 300dpi)
- Set your page to the desired size
- Set the desired number of artboards or pages
- Set your bleed to at least 3mm on all sides
- Create your document, you should now see a red guideline around the outside of your page. The space between the white page area and the red area is your bleed
- The red line can be hidden using the show or hide guide command
- Fill this area with your design, but remember that it will eventually be cut off so do not include any important text or key parts of your image
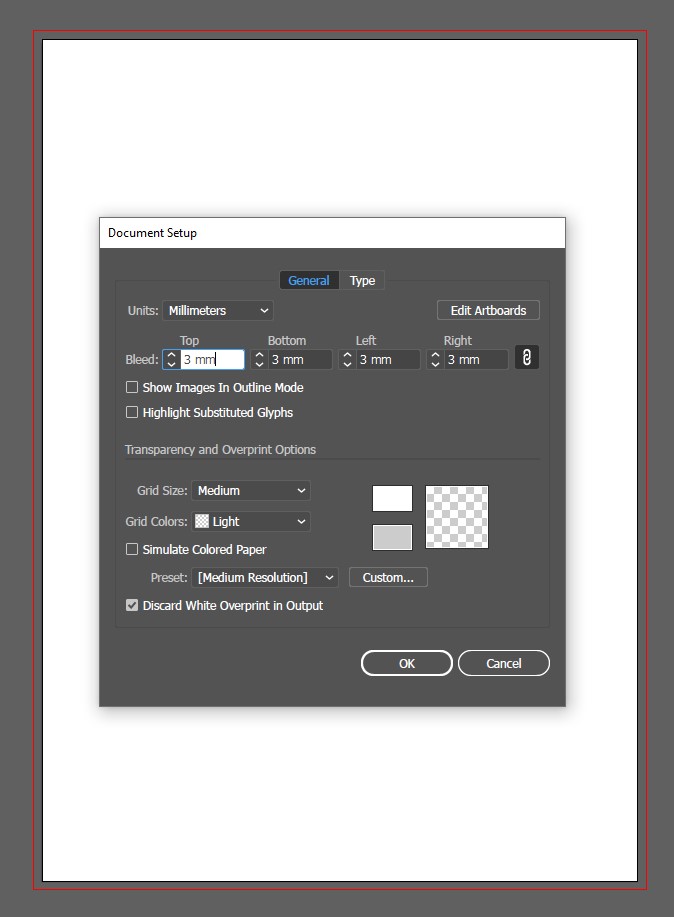
Adding bleed to an existing Illustrator document
Sometimes you will need to add bleed to a design that already exists, it is possible to add a bleed area using the following steps but you must also extend any images or backgrounds to the edge of the bleed area afterwards. If you don’t then you are only creating white space around the edge of your document that will not help us trim down for an edge-to-edge finish.
- Open the document you need to edit
- Select the ‘File’ menu
- Click on ‘Document Setup’
- Enter a bleed value of at least 3mm on each side
- Press ‘Okay’
Exporting an Illustrator document with a bleed area to .pdf
When you are ready to export your file for print you must make sure to include the bleed as part of the export settings
- Save your document
- Select the ‘File’ menu
- Click on ‘Save as’
- Give your file a name
- Select ‘Adobe PDF’ from the ‘Save as type’ dropdown
- Press Save
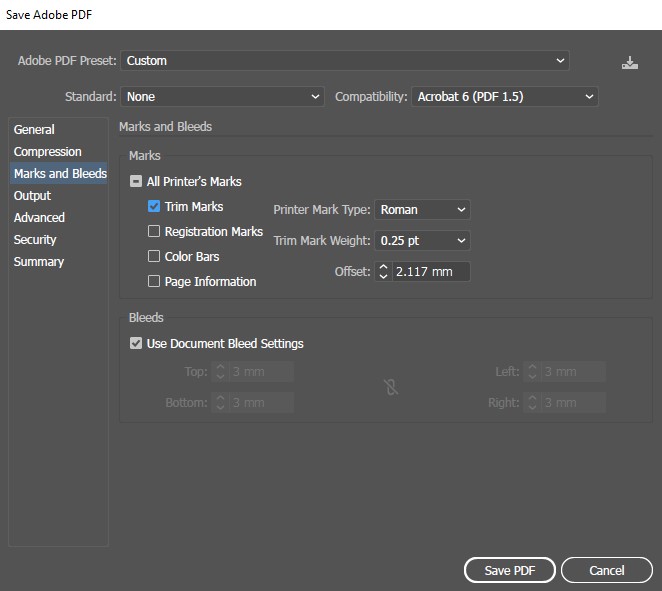
Illustrator will open the export options dialogue box
- Select ‘Marks and Bleeds’ from the left-hand menu
- Check the checkbox for Trim Marks from the top right-hand menu
- Check ‘Use Document Bleed Settings’ from the bottom right-hand menu
- Select ‘Export’
How to add bleed in Photoshop
Unlike InDesign and Illustrator, Photoshop has no native support for adding a dedicated bleed area to your design so it must be done manually when initially setting up your file. For the following advice to work you must make sure you set up your file with a resolution of 300dpi, at the desired page size.
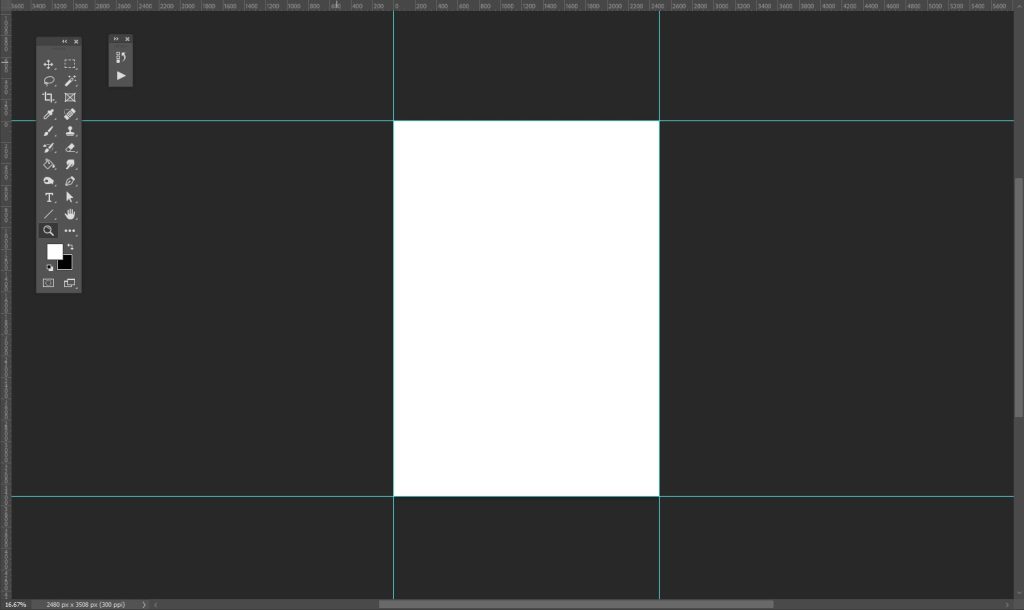
Adding bleed when creating a new Photoshop document
- Open the new document dialogue box
- Choose ‘Print’ from the pre-set menu (this will automatically set your print resolution to 300dpi)
- Set your page to the desired size
- Create your document
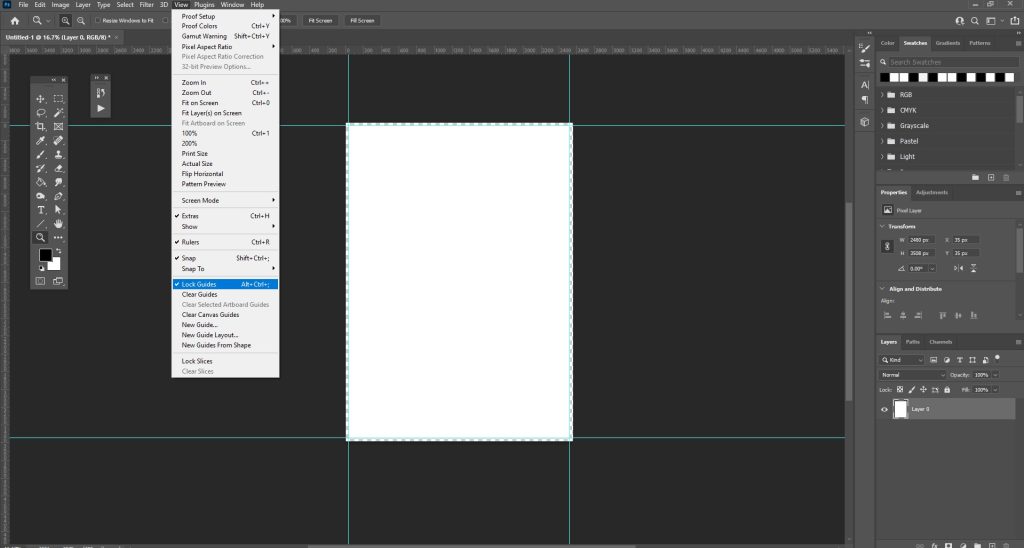
- Select the ‘View’ menu from the top of the page
- Enable Rulers
- Drag a ruler to each side of your blank page – these will act as your bleed guides
- Select the ‘Image’ menu from the top of the page
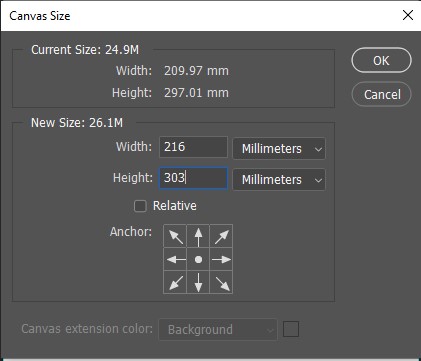
- Select ‘Canvas Size’
- Add 6mm to the width and height of your document
- Make sure the anchor point is the centre of the page
- Press ‘Okay’
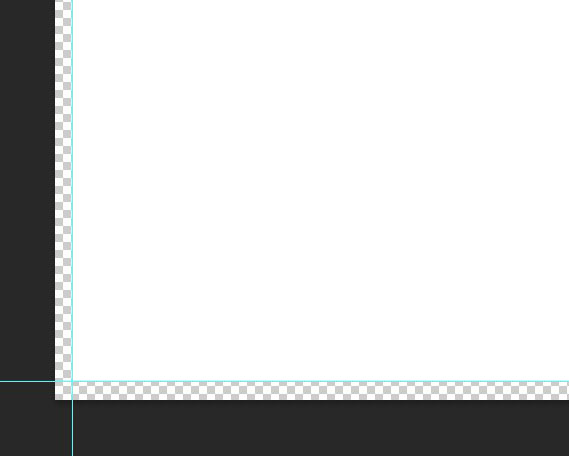
The document will extend by 3mm in each direction and your guides will indicate the actual desired print area. Be careful not to move the guides as you work (they can be locked in place by selecting ‘Lock Guides’ from the ‘View’ menu).
Adding bleed to an existing Photoshop document
- Open the document you need to edit
- Select the ‘View’ menu from the top of the page
- Enable Rulers
- Drag a ruler to each side of your blank page – these will act as your bleed guides
- Select the ‘Image’ menu from the top of the page
- Select ‘Canvas Size’
- Add 6mm to the width and height of your document
- Make sure the anchor point is the centre of the page
- Press ‘Okay’
The document will extend by 3mm in each direction and your guides will indicate the actual desired print area. Be careful not to move the guides as you work (they can be locked in place by selecting ‘Lock Guides’ from the ‘View’ menu).
Extend your artwork to the edge of the artboard, making sure to keep all important text or key parts of your images within the guidelines.
Exporting a Photoshop document with a bleed area to .pdf
- Save your document as a Photoshop file
- Select the ‘File’ menu
- Click on ‘Save as’
- Give your file a name
- Select ‘Photshop PDF’ from the ‘Save as type’ dropdown
- Press Save
Photoshop will open the export options dialogue box
- Uncheck ‘Preserve Photoshop Editing Capabilities’ to prevent very large files
- Press ‘Save PDF’
What should my exported .PDF look like?
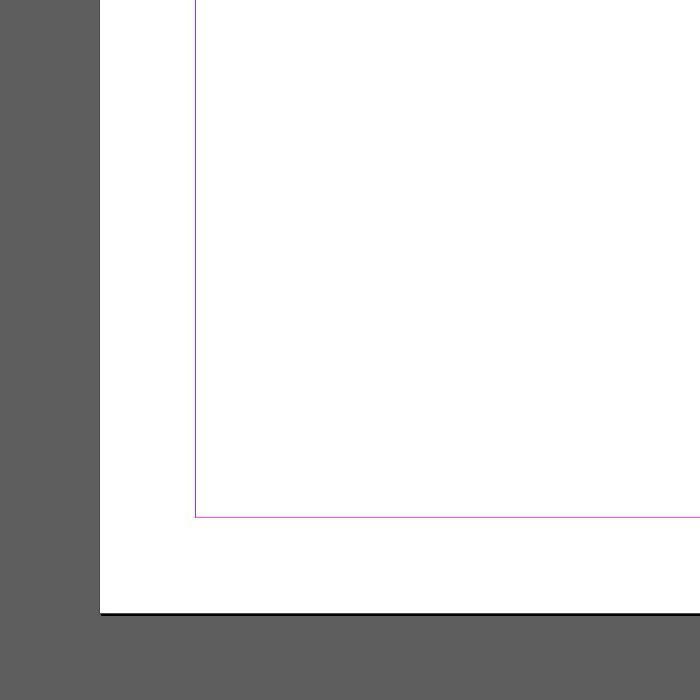
If you have exported your document from InDesign of Illustrator:
Once you export your .pdf file you may be presented with a document that looks a little unusual. This is because it will include trim marks and the bleed area. Each corner should not have a vertical and horizontal line. These are the trim lines.
Imagine the box made from cutting between opposite trim lines – this should represent the final print you want to receive.
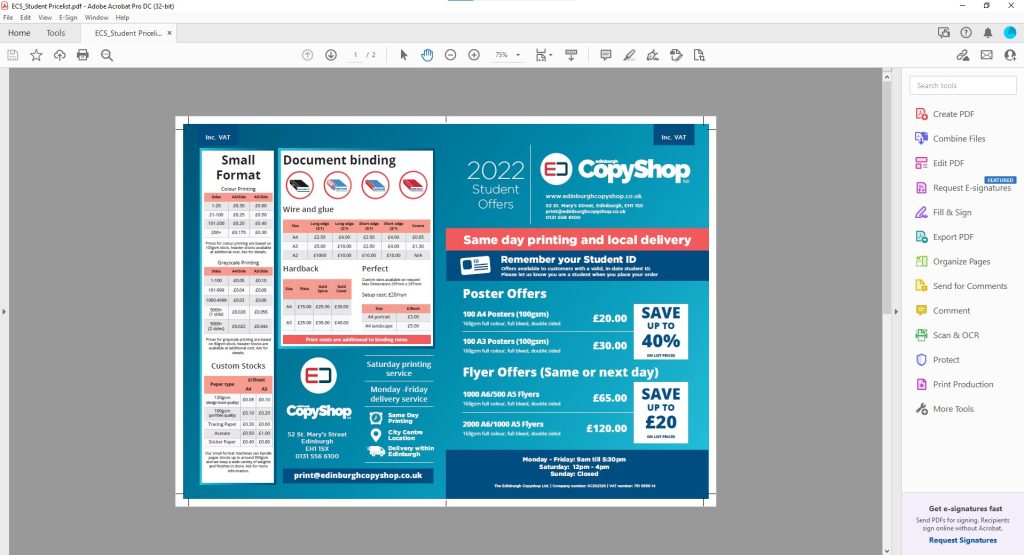
If you have exported your document from Photoshop:
Photoshop doesn’t natively support exporting .pdf files with crop marks so your document should look as it did when you were working on it in Photoshop. The document size should be 6mm greater in each dimension than the final print you wish to receive.

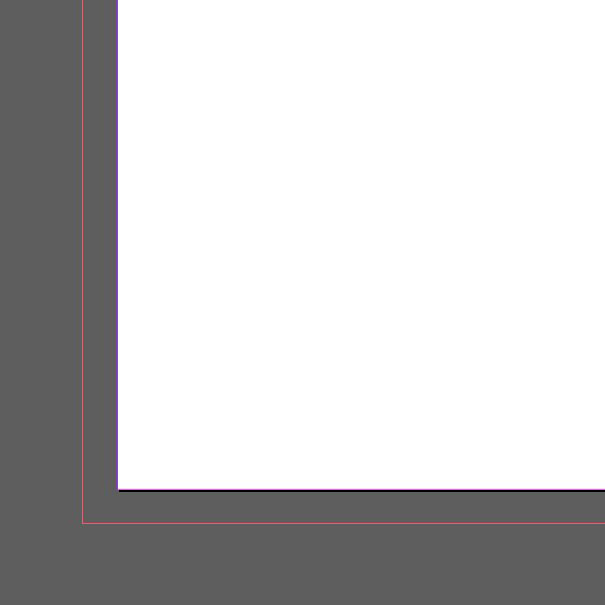
Setup Error: This document has been exported with crop marks but no bleed. Notice that the backgrounds do not extend past the marks.

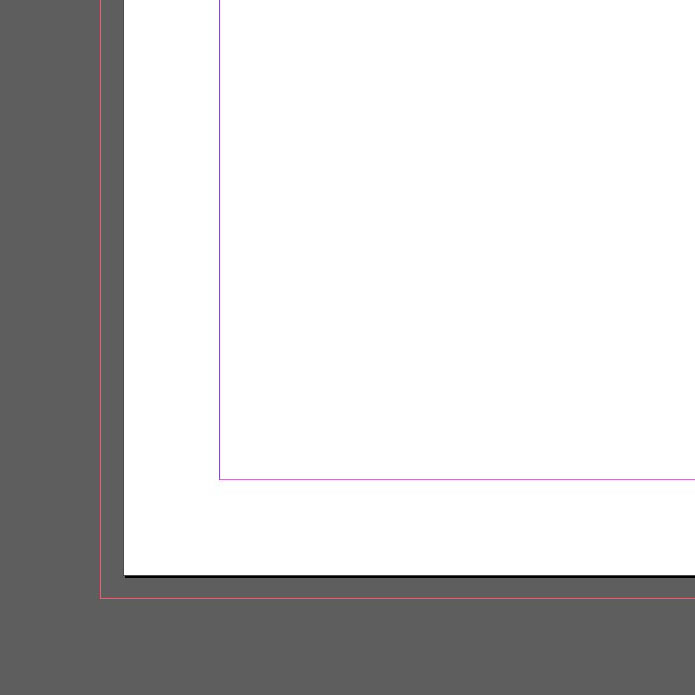
Setup Correctly: Notice that the backgrounds extend past the lines created by the trim marks. There would be print on both sides of the line when trimmed.
Can the Edinburgh Copyshop add bleed to my document?
It is not possible for us to add a proper bleed to your .pdf document once you have sent it to us however we have 2 options for giving an edge to edge result – but both require us cutting in to your design. This means that you will lose areas of the design that were intended to be part of the final artwork. To create edge-to-edge printing without a bleed we can:
Increase the scale of the document and trim down to your intended size
This option retains the finished page size of your document by scaling up all the pages and trimming in to the edge of the design.
Retain the scale of the document and trim below your intended size
This option results in edge-to-edge colour but the final print will be physically smaller than the intended size. This method minimises the amount of print that will be lost to trimming but some of the outside of the design will still be lost.
For either of these solutions to work there must be a suitable amount of page margin to cut in to without trimming text.